Friday, October 4, 2013

Keeps Me Hanging On

I just moved to Portland a couple of weeks ago, which explains my disappearance. Moving is not my favorite activity, but on the bright side, a new apartment offers a plethora of DIY opportunities.


A couple of days into moving, I was wondering about uses for those plastic hangers that are often attached to packages of tights.

I was staring at my hanging jewelry rack when it hit me. They would be perfect to use for extra hooks on the rack, especially of large things, like bangles.                    
     I have a few to hang onto for later!


It is amazing what can be done with what is usually thrown out.


Tuesday, September 17, 2013

The Elephant in the Room

Jennifer Meyer Elephant Necklace (Rose Gold) 
Image: Ylang23.com

I kept running across pictures of this amazing Jennifer Meyer elephant necklace over the summer. It is a custom order, and available for $2050.00. If you have been following this blog, you know I will not be purchasing it any time soon. (At least not until I see an elephant fly...)

I may not be able to get this just yet, but I found something to make me happy in the meantime. Not only was I able to (yes, you guessed it) DIY this, but I was able to do so very quickly, and so can you. 

It took me less than 5 minutes. As soon as I saw the elephant beads by Bead Landing at Michaels, I was reminded of Meyer's original. The only other things I needed were Bead Landing's gold toned leather cording and Lilly Ollo's sliding knot tutorial, featured here.


                                            It is by no means any kind of copy, but I like it. 


Wednesday, August 14, 2013

Play Yen Around


Available at my Etsy Shop


I acquired some play Yen coins in Japan. I thought they would make great charms, and I am thrilled with the results. 

Available at my Etsy Shop


Sunday, August 4, 2013

More on DIY Skin Care

After just a few days of using my DIY makeup remover, my skin is looking so good that my Mom has been commenting on the subject. Since I am so happy with my first foray into DIY skin care products, I am wondering what else I can successfully make. I doubt I can stop completely relying on commercial products. However, after just one usable item, I am more confident that the self-made route can be effective. With that in mind, I wanted to share some tutorials which caught my eye recently.

1. It turns out that one of my favorite brands of clothes (Free People) has a lot of tutorials. I am intrigued by their Sea Salt Spray for Hair DIY.

2. Have you ever seen 'The Doctors?' A few days ago, I caught an episode for the first time. The spokesdoctors listed a plethora of low-priced, DIY beauty products.

They included things such as eyeshadow made out of green tea and eyebrow powder from cocoa powder. They sound great, but I would be concerned about having an aroma best suited for drinks.

Their Pink Bismuth Anti-Acne Mask seems worth trying as well. Besides any skin benefits, their page says that it is a bargain at "$3.99." This is where being a bargain shopper pays off. Generic Pepto Bismol is available at Dollar Tree. If you are interested in trying one out, you can get 4 bottles of mask supplies for the price of their one.

I look forward to trying a few of these. Maybe some of you will beat me to them. If so, please feel free to send over a review and/or any pictures of your results.


Sunday, July 28, 2013

(Casey) Newman's Own–DIY Makeup Remover

(Casey) Newman's Own
Makeup Remover
This is where I realize this is
only funny if you already
knew my name... 
This DIY is not about salad dressing, but it does involve oil.

I do not wear a lot of cosmetics, but when I do, I am diligent about their removal. Makeup remover is pricey. Even when buying one of the less expensive brands (like something from Target), they cost around $5.99-7.99 on average.

Readers, I am sure you hear me. It may not be a bottle of Christian Dior at $29/4 ounces (Yeesh!). Even so, I would rather have every odd month's $6-8 earmarked for something else.

This is why I love the wonderful world of DIY. Finally fed up recently, I hit the internet for some research and found a great tutorial. There are several, but thanks to this informative one by Michelle Phan, I am free from buying makeup remover ever again.

Her tutorial called for "extra virgin olive oil, water, and a some kind of container." (Mine was a pump bottle already on hand from MUJI New York). Since the only ingredient I paid for was the olive oil, $4.99 (less than I used to spend on each supply) will last me at least a year–probably more.

I am also delighted by the lack of any ingredients with names like "Dipropylhacoa;lkwjealokeajkfhna;kfahnaknvk3209uatn;lialkwhje." Usuallly, such products have at least 5 similarly named items. Moreover, it works quickly, easily and is quite moisturizing. Next, I will have to scout out a DIY toner. Any suggestions?

Saturday, July 27, 2013

DIY Diversion

I began DIYing to either make gifts for other people, or things I needed to organize my room. Those types of things are still the bulk of my crafting. I also make things for my Etsy shop.

I rarely make something for myself like this cute bracelet. However, when I saw these ceramic owls by Blue Moon Beads on sale at Joanne Fabric's recently, I could not resist.

The best part is that this custom-fit bracelet (which would easily have cost 2x more in a store) was so simple to make. Just thread 1.8mm Stretch Magic through the beads. It was done in minutes. Knot three times, and glue the knot if desired.


This was my first time using 1.8mm, and it worked out quite well.

Friday, July 19, 2013

Dewey's Homemade Organ

Watching a few 'Malcolm in the Middle' reruns, recently, I was reminded of one of my favorite episodes. Dewey (the youngest child for much of the show's run), builds his own organ. He pieces one together out of odds and ends from around the house.

The thought of being able to learn the organ by one's self is staggering enough, let alone building it that way. It would be the ultimate DIY project.

No, sadly, I am not about to reveal my freshly homemade organ to you. For now, it is a bit above my pay grade. I love the idea, though.

A search revealed a plethora of homemade organs. (Unfortunately, no tutorials on how to make Dewey's).

I am not leaving you empty-handed, though. Here are two DIY organs which are just amazing:


Pipe organ chair from the crew at 2pointhome.com.

PVC pipe organ by TheCshamblen. Using flip-flops as mallets is a truly inventive revamp. Not to mention the execution of a Sound of Music/The Office/Rugrats medley on PVC pipes. Bravo.

Wednesday, July 3, 2013

C is for Counter, That's Good Enough for Me

How many of you have a multiple towel system in your kitchen? Maybe you have one to wipe spills on the counter, but another to dry dishes? Perhaps some have a separate one just for the hands? I have known people with many different styles.

Whatever your system, no matter. This is not about how one keeps his or her kitchen. However, if you have more than one towel, let me suggest a tip for keeping them organized. 

Try initial monogrammed towels to keep your kitchen towels apart, easily. For example, get a D for your dishes, or an H for your hand towels. (And now, the title makes sense). If one is a strict adherent to his or her system, there is an added benefit. The alphabetic drying apparatuses make it easy for guests to remember which cloth to use, and when.

19 Twenty Apartments has a brilliant tutorial on simple, chic, monogrammed towels. I would buy these somewhere. I am glad I found the site instead. If you are looking to buy, not DIY (and who doesn't sometimes?) please support a fellow DIYer if you can. Check out these great towels on Etsy, where you can get custom goods and support a fellow artist.  


Tuesday, June 25, 2013

How Have I Never Blogged About These?

I cannot believe I neglected to mention these. Several months ago (maybe even a year prior) a friend had a birthday. Low on budget, but wanting to bring a gift, I made one of my first jewelry revamps. I also made really cute wrapping (and protective packaging) out of a nice pill package, two pieces of decorative paper and some left over tissue. (You have to love a festive upcycle).

The greatest upcycle trick is all the wonderful things you can do with scraps. Look at the "bow" I made with them. In the bottom picture, you can check out the gift tag I made with a larger scrap. Just punch a whole in it, write your message, and use a metallic twist tie.

As for the bracelet, you can find the tutorial here.


Sunday, June 9, 2013

Sticking to It

I recently made some magnets for my friend, M. They were like the My Little Pony magnets I made last year, only I used glass pebbles and origami. I met M in Japan, so the origami felt quite appropriate.

Wrapping them was a challenge. I wanted them to look nice when opened, but the gift was going to be shipped across the country. They were going to end up all over the place in the box while shipping.

 I tried using 3M Removable Mounting Squares to affix them to cotton lining the box. They stayed put nicely, but still fell if I turned the box upside down.

I glued the cotton lining to the box next. Perfect. Much to my surprise, even when I flipped the box upside down, the magnets did not move.
They're not falling!


This is my Martha Stewart moment. Wrapping this presentably and functionally may have been my finest crafting move yet. (Of course, I will never attain Martha's level of perfection, but trying is a good thing).


Friday, April 26, 2013

Nail Art is Hard

Bert and Grover
This is my first try at character nail art. I have not painted since elementary school. Moreover, I have the tiniest nails imaginable; not a great canvas. As such, I am thrilled they turned out as well as they did, especially considering it was my first time making the effort.

•Bert and Grover turned out the best. Oscar was decent, too.
•Ernie did not work out... at all. He's a sad mix or orange and black smudges on my pinky (situated next to Bert).
•Snuffy was less of a disaster, but not photo worthy.
•Cookie Monster actually turned out well, but I did not get a great photo. I was especially pleased with Cookie since that sweet-toothed devil is on my right hand. (Quite hard to do this with my left).
 •Poor Big Bird never got past the idea stage.
 •I got Telly's features correctly, but he ended up looking more like Mimi from the Drew Carrey Show.
 •And to my surprise, Kermit actually ended up looking pretty okay, too, especially for my right hand.


Oscar
If I am not saying "yaaaaaaaaaaaaaaaaaay!" like a Muppet, why did I post my work? Here is the lesson: sometimes, when starting a new hobby, whether it's crafting, learning a new instrument or what-have-you, we are unsatisfied with the results. So it goes. It is a challenge, but keep working at it. This serves as a reminder.
I hope to get back to all of you with better looking character nails                                          in a few months. I will try to work out a few other things, too.


Kermie!

Tuesday, April 16, 2013

10 Minute Necklace

  I had a few agate beads left after making my agate beaded stretch bracelet. What could I do with 3 beads? I made a great necklace. It probably took me less than 10 minutes, and I love the result. Simply thread the beads on the cord, knot them on either side, then do a simple slip knot in lieu of a clasp. It is a great solution to a few leftover beads. Try it when you have a material surplus!


Sunday, March 31, 2013

Store Launched!

I'm on Etsy! :D


I am so excited to announce that I have created an Etsy store! If you liked the items in Beaded Peaces, you can find them there. I will be adding more in time. Thank you so much for continuing to read my adventures in crafting.

Shop Link

Friday, March 22, 2013

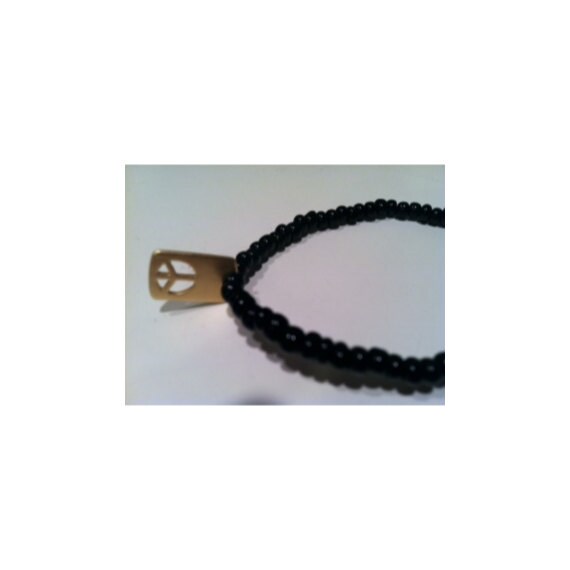
Beaded Peaces


 I found these little peace tags and had to work with them. I love having an armload of bracelets, especially during spring and summer. They are perfect for the ever returning bohemian aesthetic. Now if only spring would come back to us...

Wednesday, March 6, 2013

Ring Around the Washi

I have a lot of ribbon tape. The little individual rolls are messy to store once you have opened them. I found a brilliant revamp online recently. I cannot find the link, but someone had taken a multi-rung pant hanger and used it for their ribbon tape/washi tape collection. I was in awe.

When I could not find a budget-friendly pant hanger and did not have one somewhere in my own house, I decided to see what I could throw together. The results were wonderful. First, I sought out shower curtain rings. The cheapest ones I could find at Target were $1.24. I nearly bought them, but decided to check Dollar Tree instead. I thought that saving 24 cents would not be worth my time. I was wrong. They must have been having a close out, because the same type of shower curtain rings I almost bought for $1.24 at Target were 1 cent. That's right, I saved 124%.


The result did not look as nice as if I had used a multi-tiered pant hanger, so if price is no object, get one of those. They are still not very expensive. If you want something functional which costs as little as possible (only a penny in my case) this works very well. It is functional and space saving, and now, safely in my closet.

Tuesday, February 19, 2013

First Reader Submission

An earring holder made out of a bookend and wash tape.
Pardon my use of exclamation points. I know they are not proper; I avoid them even in casual blog writing, but I cannot contain my excitement. I have received my first reader submission! (See, if you have to do something inappropriate, do it at the most appropriate time. I believe I have done so).

Made from a bookend, Ashley's earring holder truly captures the spirt of "reuse, revamp, upcycle." I love it. Check out Ashley's adventures in craftiness and travel.

Sunday, February 10, 2013

Live Every Week Like it's Shark Week


 Will everyone who is already missing 30 Rock raise their hands? Oh, I see. Just as I suspected; everyone does.

One of the best shows in the last decade may be over, but we can still keep learning from the time-honored lessons of the great sage, Tracy Jordan.

That's right everyone, "Live every week like it's shark week."

I think this needs another coat of Modge Podge Dimensional Magic, but I could not wait to post. The pendant on the left does not have the cording yet. Below is the cord with a sliding knot. If you missed my last entry on this, check out Lilly Ollo's Tutorial. It is an extremely convenient way to finish a necklace.

It may not be Shark Week right now, but we can still live as if it is.

Friday, January 25, 2013

Tied Up in Knots

With spring not nearly close enough, but always on my mind in the recent sub-zero weather, this project seemed like a good one to share. These bird nest necklaces have been floating around on the internet for a while. I thank Pinterest for leading me to tutorials on this subject. 

Here are two ways to make them look great without using findings (which is nice if you have run out or are budgeting). 

1. Forget the clasp. Make an adjustable sliding clasp, instead. I added artificial pearls at the ends to make the knot easier to open and close.

If you are making a necklace as a gift and are unsure of the length necessitated, an adjustable sliding clasp is perfect. 


Sliding knot clasp
                                       

 2. Use the nest itself as a jump ring. Since the wire wraps around and around, there is no need for a jump ring. Just warp one of the rungs of the nest a bit then thread your necklace through it.

I think it turned out well, but most importantly, my friend liked it. That is all that matters. I hope it keeps  her thinking of spring.

Monday, January 14, 2013

Sock it to Me

I have the absolute worst dry hands. Then there are my cuticles; they cause panic in manicurists, who seem to wish they could take acid to remove them. The solution is supposed to be a simple "sleep with gloves and a thick moisturizing cream on them."

Finally deciding to take matters into my own hands, I went to buy moisturizing gloves. Ugh, $7.00. Alright, seven dollars is really not too expensive, but I would prefer that for my new guitar fund.

Then it hit me: Socks. I already have plenty on hand. The glove shape seems necessary for fishing for one's keys in the cold, but not so much for sleeping.

Give it a try. You can upcycle a pair of socks you are probably not using anyway, save a few dollars and protect your skin from the weather, especially if you live in a wintery state like me.

Saturday, January 5, 2013

Organizing? Shop Your Own House!

January has come and the stores' seasonal aisles have changed, beckoning us to organize. The quest to have clean room and clean mind is always popular, but nothing seems to provoke organization frenzy like a new year on the calendar. It is great to take this time to re-arrange everything, but before you run off to the store, shop your own house.

I found a candle votive stand from high school. With the votive missing, I thought the stand had outlived its usefulness. Then, I absentmindedly sat my hat on it one day. Before I realized it, I had a bowler hat hanger.

 Boom. Easiest upcycle ever. (How perfect, since this one hat unfortunately cannot hang on my hat rack).


Anyone else want help organizing their to-do pile? I know we can buy these things, and this is nothing new, but here is my version. Once again, I did not step foot into a store for this revamp.

I simply used cereal boxes, paper and stickers which I already had. If you don't have stickers (or have better handwriting than me) you can always use a Sharpie. I also used the same washi tape which I have used for so many projects. (K&Company Smash Tape).

I have a few other boxes I want to make into organizers. We will see what happens. While the stores have so many exciting options and fun colors, I am glad I can bring new life to some materials already on hand, without spending a thing.

See what you find when you shop around in your home.


Wednesday, January 2, 2013

And The Rest

Happy New Year, everyone!

The rest of my friends must have received their holiday gifts by the end of last year, so I can finally post them here. A bunch of my friends love My Little Pony: Friendship is Magic. It took me a while to think of a gift I could make them, but here we go!

My Little Pony Magnets


I also made a couple of Doctor Who things for my DW fan friends.

Necklace for my friend


Cell phone strap (front)

back of strap
 The end of the holidays makes me sad, because it might mean a slowdown to my DIY activities. Well, we'll see. Stay tuned.